

DISCLAIMER: This tutorial is being written as a guide and in no shape or form do I hold liability for any damage you cause to your vehicle by attempting this procedure individually and not by a professional, certified mechanic.
Possible Symptoms of Failure:
-- No brake light illumination upon depression of the brake pedal
-- Continuous brake light illumination after car is shutdown and ignition is OFF
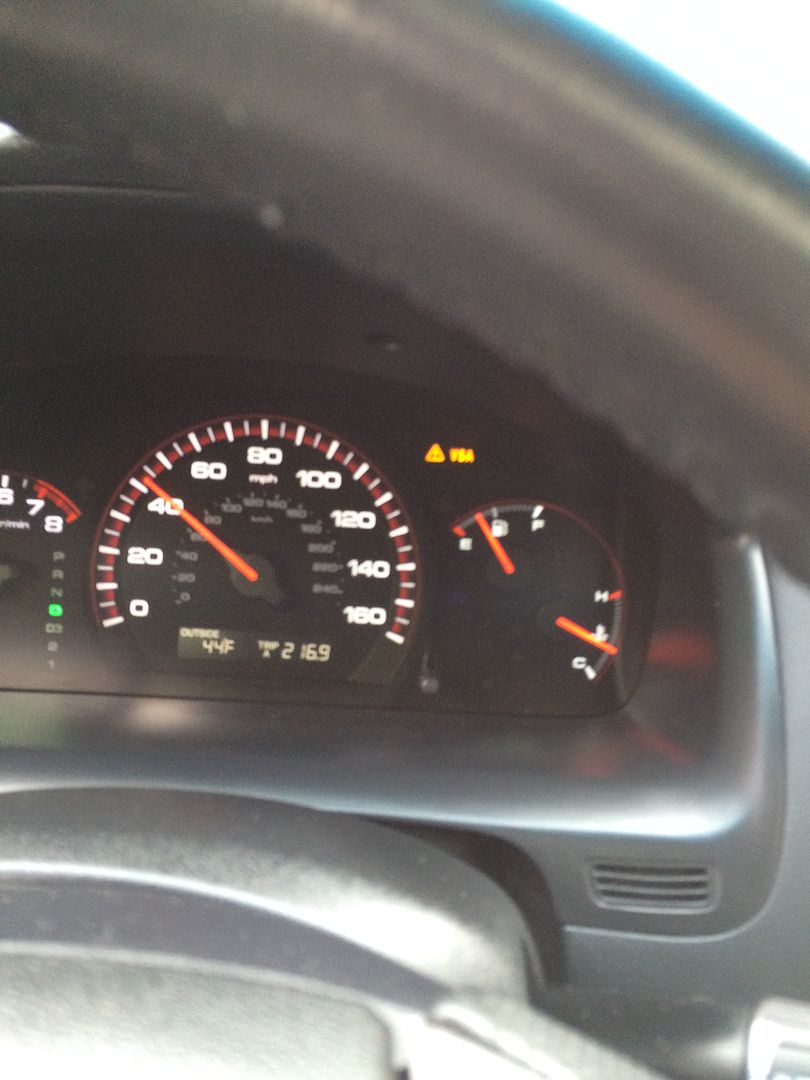
-- Steady /!\TCS ('03-05) or /!\VSA ('06-07) illumination (TCS/VSA will blink when the system is actively assisting the vehicle to gain stability. Steady illumination is indicative of an issue with either the module or in my case the BLS)
VIDEO:
My Video Explanation / Demonstration
I started seeing my /!\VSA light come on in a steady state for no apparent reason. After searching around on the forums, I came to the conclusion that the brake light switch (which is known to fail) must have went bad / was malfunctioning, even though I still had fully functioning brake lights!
![Image]()
PICS:
1) Start by removing the steering wheel column panel and under grommet by carefully pulling and releasing the tabs to gain access to the brake light switch.
** Remove 1 Philips screw (bottom left of steering wheel panel) first **
![Image]()
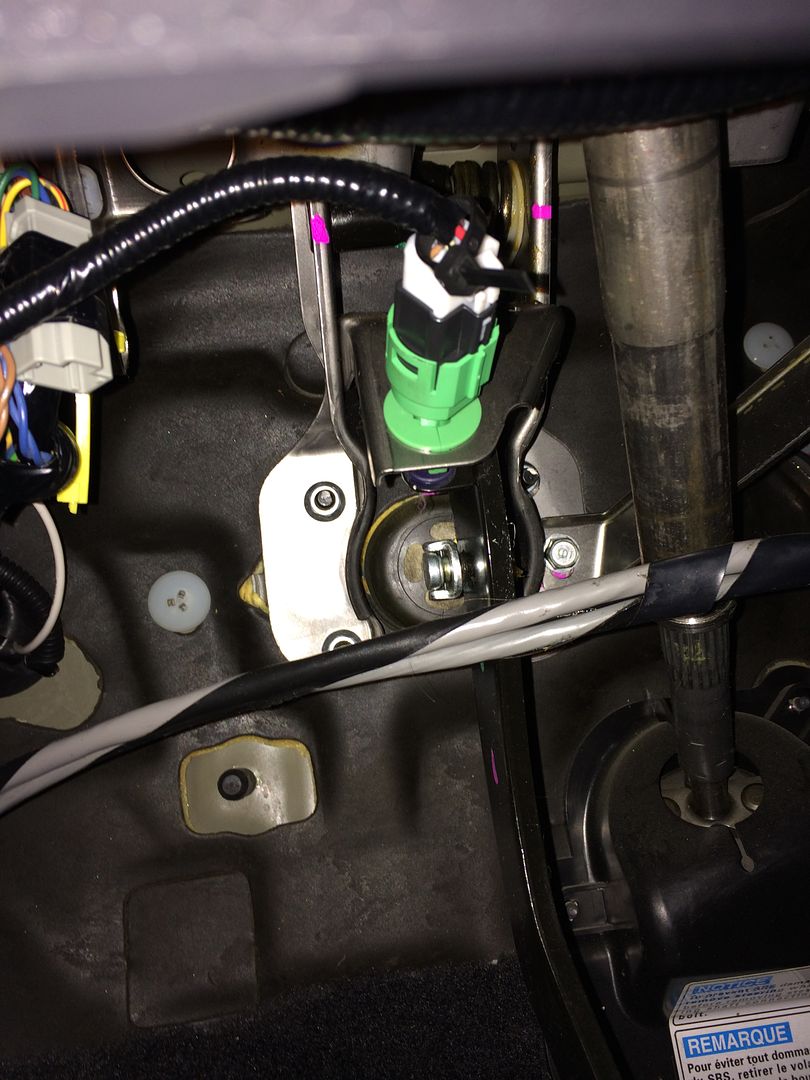
2) Switch location - directly above brake pedal
![Image]()
3) Brake pedal in full resting position:
![Image]()
(If you look closely, you can see a little piece of the white that is still sticking out on my old switch, even with the brake pedal at full resting position)
4) Brake pedal being depressed:
![Image]()
(In this pic, you can see the bluish-purple plate that engages/disengages the switch as the brake actuator moves forward/backward)
HOW-TO: Remove and Replace a 7th Generation (2003-2007) Honda Accord Brake Light Switch
Possible Symptoms of Failure:
-- No brake light illumination upon depression of the brake pedal
-- Continuous brake light illumination after car is shutdown and ignition is OFF
-- Steady /!\TCS ('03-05) or /!\VSA ('06-07) illumination (TCS/VSA will blink when the system is actively assisting the vehicle to gain stability. Steady illumination is indicative of an issue with either the module or in my case the BLS)
VIDEO:
My Video Explanation / Demonstration
I started seeing my /!\VSA light come on in a steady state for no apparent reason. After searching around on the forums, I came to the conclusion that the brake light switch (which is known to fail) must have went bad / was malfunctioning, even though I still had fully functioning brake lights!
PICS:
1) Start by removing the steering wheel column panel and under grommet by carefully pulling and releasing the tabs to gain access to the brake light switch.
** Remove 1 Philips screw (bottom left of steering wheel panel) first **

2) Switch location - directly above brake pedal
3) Brake pedal in full resting position:
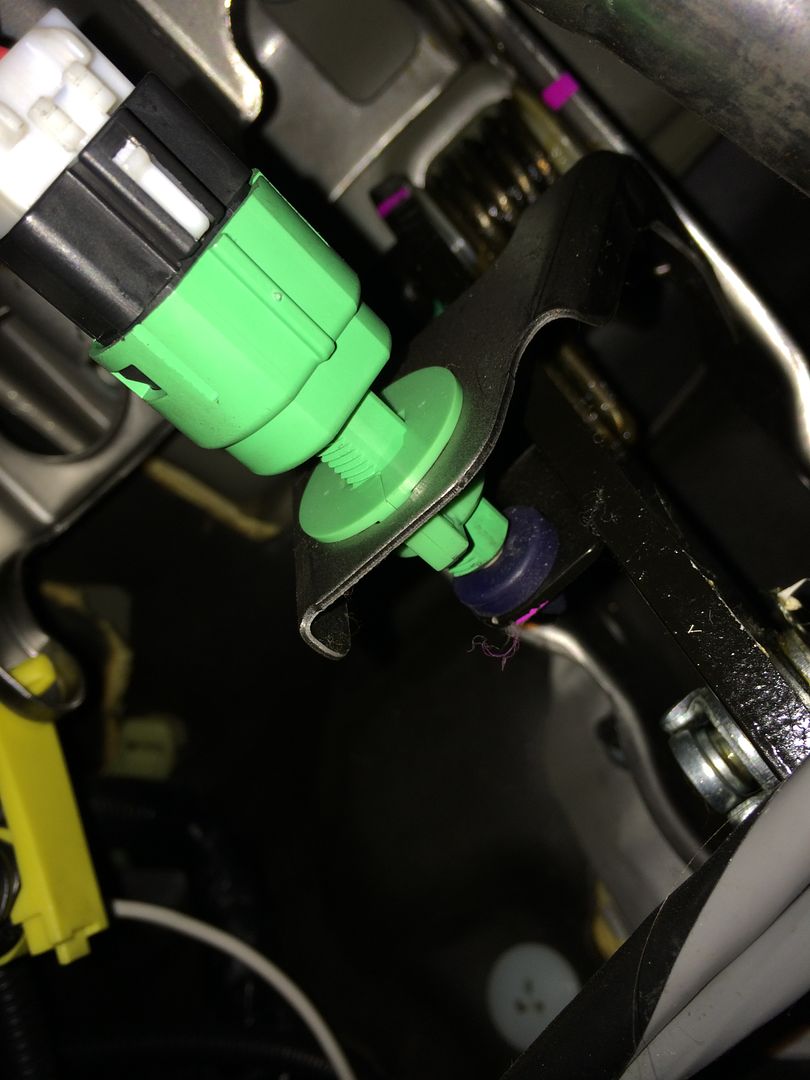
(If you look closely, you can see a little piece of the white that is still sticking out on my old switch, even with the brake pedal at full resting position)
4) Brake pedal being depressed:

(In this pic, you can see the bluish-purple plate that engages/disengages the switch as the brake actuator moves forward/backward)


